Have you ever scrolled through social media and thought, “Wow, their graphics are amazing! How do they do that?”
You’re not alone. In today’s digital age, a strong social media presence is essential for any brand or individual. And eye-catching visuals are the secret sauce to getting noticed in the endless scroll of feeds.
It’s not hard to apprehend that impactful visual content can convey an idea immediately. As a matter of fact, almost 65% of humans are most likely to remember information that comes along with an image.
Graphics are a solid way to cement a visual brand identity. Check out this vibrant infographic by Owlet for instance.

Social graphics also tend to have higher engagement rates than written ones. Here are a few interesting facts for you:
● Facebook posts with photos get more likes and shares.
● LinkedIn posts with images have a much higher engagement rate than average.
● Even, Tweets with visual content are three times more likely to get comments.
But who has time to become a design whiz? The good news is, you don’t have to!
With the right tools and a little guidance, anyone (yes, you!) can create professional-looking social media graphics that stop thumbs in their tracks. In this step-by-step guide, we’ll use Canva to help you unleash your inner designer and create graphics that elevate your social media game.
Get ready to ditch the boring stock photos and level up your social media game with visuals that truly represent your brand or personality!
Step 1: Define Your Purpose & Audience
Before you even open Canva, take a moment to answer these questions:
- What’s the goal of this graphic? Are you promoting an event, sharing a blog post, announcing a product launch, or simply making a statement?
- Who are you trying to reach? Understanding your target audience will help you tailor your design choices. What are their interests? What kind of visuals appeal to them?
Pro Tip: Create a list of keywords or phrases that resonate with your audience and incorporate them into your design. This will help your graphic show up in searches and be more relevant to your target audience.
Further, taking a look at your competitors’ graphics can be a great reference point to begin your visualization stint.
Step 2: Choose the Right Dimensions & Platform
Each social media platform has its own ideal image dimensions. Canva offers pre-sized templates for each, making it easy to get started:
- Instagram Post: 1080 x 1080 pixels (square)
- Instagram Story: 1080 x 1920 pixels (vertical)
- Instagram Reels: 1080 x 1920 pixels (vertical)
- LinkedIn Post: 1200 x 627 pixels (horizontal)
- X (formerly Twitter) Post: 1200 x 675 pixels (horizontal)
- Facebook Post: 1200 x 630 pixels (horizontal)
- Pinterest Pin: 1000 x 1500 pixels (vertical)
Pro Tip: If you plan to share your graphic across multiple platforms, create a square version that can be easily adapted. You can also use Canva’s “Magic Resize” feature to quickly adjust your design for different platforms.

Step 3: Select a Theme or Template
Canva offers a vast library of free and paid templates. Here’s how to choose the right one:
- Reflect Your Brand: Select a template that aligns with your brand’s colors, fonts, and overall aesthetic. Consistency is key to building brand recognition.
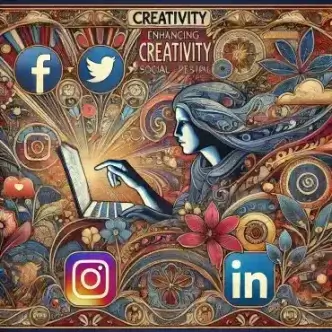
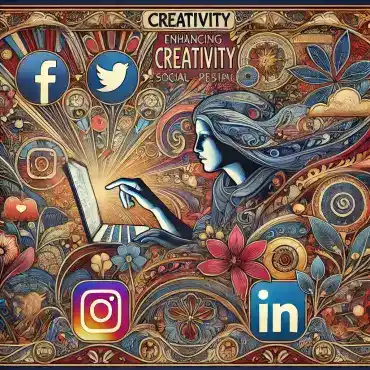
Even, the layout of elements in images makes a significant difference. Let’s take a look at these two images.


Both these images depict perfectly how proper alignment and proximity of elements highlight the message and purpose of the images. The right placement of image elements plays a huge role in brand identity when done correctly.
- Work Kits: Not sure where to start? Canva’s Work Kits are your secret weapon! These curated collections of templates, elements, and resources are designed for specific industries and projects, so you can find everything you need in one place.
Whether you’re crafting a marketing campaign, onboarding new employees, or designing eye-catching social media posts, Work Kits provide a tailored starting point. With pre-selected fonts, color palettes, and design elements that align with your project’s goals, you’ll save time and create cohesive visuals effortlessly.
Here’s how Work Kits can supercharge your design process:
-
Explore & Choose: Browse through the diverse range of Work Kits and select the one that best suits your project.
-
Customize: Easily personalize the templates with your own content, images, and branding.
-
Collaborate: Share your Work Kit with your team for seamless collaboration and feedback.
 Pro Tip: Explore Work Kits early in your design process to discover new ideas and inspiration, or use them as a foundation to build upon and create something truly unique.
- Match Your Message: Choose a template that complements the tone and content of your post. A playful template might be perfect for a lighthearted announcement, while a more professional one would be better suited for a serious topic.
- Consider Your Industry: Opt for a template that resonates with your target audience and industry. For example, a tech company might choose a modern, minimalist template, while a fashion brand might opt for something more trendy and eye-catching.

Pro Tip: Don’t be afraid to customize a template! Change the colors, fonts, and layout to make it your own. Canva’s drag-and-drop interface makes it easy to experiment and create something unique.
Step 4: Find (or Create) Striking Visuals
Images and graphics can make or break your social media post. Here’s how to find the perfect visuals:
- Canva’s Library: Browse through Canva’s extensive library of free and paid images, illustrations, and icons. You can search for specific keywords or browse by category.
Also, choosing the right complimenting colors can make or break the overall aesthetic of a social media image. As colors draw certain emotions, they determine whether or not people are attracted to your images.
Here’s an interesting tool for you to help choose the right color combination for your post.

- Upload Your Own: Use your own high-quality photos or graphics. This is a great way to showcase your brand’s personality and make your designs more unique.
- Create with AI: Canva’s “Magic Design” feature can generate design suggestions based on your text and preferences. This is a great way to get started if you’re feeling stuck.

Pro Tip: Use Canva’s “Background Remover” tool to isolate subjects in photos and create more dynamic designs. This can help your images pop and make your designs more professional-looking.
Step 5: Craft Compelling Text
Text is a crucial element of any social media graphic. Here are some tips:
- Keep it concise: Use short, impactful phrases that grab attention. People are more likely to read shorter texts on social media.
- Choose the right font: Select a font that is easy to read and fits your brand’s style. Avoid using too many different fonts, as this can make your design look cluttered.
- Limit your fonts: Stick to two or three fonts at most to avoid a cluttered look.
While using fonts for your brand’s social images, they speak a ton about your business language. Let’s look at this through another example.


Clearly, the image on the left has fonts that are easy to read and complement each other better. Hence, selecting fonts that are simpler than fancy and being consistent with them goes a long way.
- Consider hierarchy: Use different font sizes and weights to create a visual hierarchy. This will help guide the viewer’s eye and make your message easier to understand.
- Add a call to action: Tell your audience what you want them to do (e.g., “Learn More,” “Shop Now,” “Sign Up”). This will help you drive engagement and achieve your goals.

Pro Tip: Canva’s “Text to Image” feature can help you generate unique text-based designs. This is a great way to add visual interest and make your text stand out.
Step 6: Arrange Elements Thoughtfully
Pay attention to the layout of your text, images, and graphics. Here are some tips:
- Rule of Thirds: Divide your canvas into thirds horizontally and vertically, and place your key elements along these lines. This will create a more visually appealing and balanced design.
- White Space: Don’t overcrowd your design. Leave some white space to give the elements room to breathe. This will make your design easier on the eyes and help your message stand out.
- Alignment: Align your elements to create a sense of order and balance. This will make your design look more polished and professional.

Pro Tip: Canva’s “Smart Mockups” feature allows you to visualize how your design will look on different devices. This is a great way to ensure that your design looks great no matter where it’s viewed.
Step 7: Final Touches & Sharing
Once you’re happy with your design, it’s time for the finishing touches:
- Review for errors: Double-check your text for typos or grammatical errors.
- Get feedback: Ask a friend or colleague for their opinion. A fresh pair of eyes can often spot things you might have missed.
- Download & share: Download your graphic in the appropriate format for your chosen platform and share it with your audience!
Conclusion
Designing professional social media graphics doesn’t have to be daunting. By following this step-by-step guide and leveraging Canva’s powerful tools, you can create eye-catching visuals that elevate your social media presence and engage your audience. Happy designing!
____________
Written By: IShan Barman